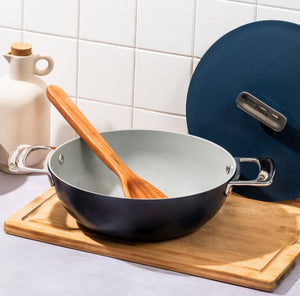


A whole roast chicken in a Dutch oven is something else entirely. The lid traps the steam in the first half of cooking, keeping the meat incredibly juicy, and then comes off to let the skin crisp up to a deep golden brown. We marinate ours in a spiced butter rub that gets under the skin and into every corner of the bird. One pot, one chicken, no stress.
Prep time: 20 mins
Cook time: 50-60 mins (plus marination)
Total time: 70-80 mins
Serves: 4-6
Ingredients for the Marinade
-
1 whole chicken, approximately 1.2 to 1.5 kg, skin on
-
4 tbsp butter, softened at room temperature
-
1 tbsp olive oil
-
6 garlic cloves, finely minced
-
1 tbsp ginger, finely grated
-
1 tsp red chilli powder
-
1 tsp coriander powder
-
1 tsp cumin powder
-
1 tsp garam masala
-
1 tsp dried oregano
-
1 tsp black pepper, coarsely ground
-
Juice of 1 lemon
-
Salt to taste
Ingredients for the Roasting
-
2 tbsp oil
-
1 large onion, cut into thick rings
-
4 garlic cloves, whole
-
2 sprigs fresh rosemary or thyme (optional)
-
1 lemon, halved
-
½ cup chicken stock or water
For Garnish
-
Fresh herbs (rosemary, thyme or coriander)
-
Lemon wedges
-
Roasting juices from the pot
Method
Step 1
Pat the chicken completely dry inside and out using a kitchen cloth or paper towel. Dry skin helps the chicken brown properly during cooking.
Step 2
In a bowl, combine the softened butter, olive oil, minced garlic, grated ginger, red chilli powder, coriander powder, cumin powder, garam masala, dried oregano, black pepper, lemon juice, and salt. Mix into a smooth spiced butter paste.
Step 3
Using your fingers, gently loosen the skin over the breast and thighs without tearing it. Spread a generous amount of the butter mixture underneath the skin.
Step 4
Rub the remaining butter mixture all over the outside of the chicken, coating every surface evenly.
Step 5
Stuff the cavity with the halved lemon and fresh herbs if using. Cover and marinate for at least 4 hours, or overnight in the refrigerator for the best flavour. Bring back to room temperature 30 minutes before cooking.
Step 6
Place the Ember Cast Iron Dutch Oven on a medium-high flame and heat the oil. Place the chicken breast side down and sear for 3 to 4 minutes until golden brown. Flip carefully and sear the other side for 2 to 3 minutes.
Step 7
Remove the chicken briefly from the pot. Add the onion rings, whole garlic cloves, and herbs to the base of the Dutch oven.
Step 8
Place the chicken breast side up over the onions. Pour the chicken stock or water around the sides of the pot, not directly over the chicken.
Step 9
Cover the Ember Cast Iron Dutch Oven with its lid. Place a tawa underneath the pot and reduce the flame to the lowest setting.
Step 10
Cook covered on low flame for 55 to 70 minutes. Flip the chicken once halfway through cooking and spoon the roasting juices over the top every 15 to 20 minutes.
Step 11
For the final browning, remove the lid and cook uncovered for 10 to 15 minutes on medium-low flame until the chicken turns deep golden brown. Rotate the pot occasionally for even colouring.
Step 12
Check for doneness by piercing the thickest part of the thigh; the juices should run completely clear.
Step 13
Turn off the flame and let the chicken rest uncovered in the pot for 10 minutes before carving.
Step 14
Serve directly from the Ember Cast Iron Dutch Oven with the roasting juices spooned generously over the chicken. Finish with fresh herbs and lemon wedges on the side.
Note:
-
Always use a tawa underneath the Dutch oven while cooking on the stovetop. It diffuses the heat and prevents the bottom from scorching during the long cook.
-
Keep the flame as low as possible. Cast iron retains heat extremely well, and high heat can burn the base before the chicken cooks through.
-
Resting the chicken before carving is essential; it keeps the meat juicy and allows the juices to redistribute evenly.